UnityJDBC can be downloaded, installed, tested, and configured for your environment in less than 10 minutes. Here are the easy steps:
-
Downloading - First, download the UnityJDBC package to your computer from http://www.unityjdbc.com/download.php.
-
Installation - The UnityJDBC installation package contains the driver, a simple query GUI, and some test programs. The
UnityJDBC_Trial_Install.jarcan be run by typing the command:java -jar UnityJDBC_Trial_Install.jar. Follow the prompts to install UnityJDBC on your machine. -
Quick Start - The installation creates a shortcut to the UnityJDBC SourceBuilder which is a simple graphical query editor and configuration tool. You can also run it directly using
initsources.batorinitsources.shin the installation directory. To try the sample queries, you will also want to click on the Start Database shortcut or run the scriptstartDB.batorstartDB.shin the directorysampleDB/hsqldb. Below is a screenshot of running a sample query that joins across two databases.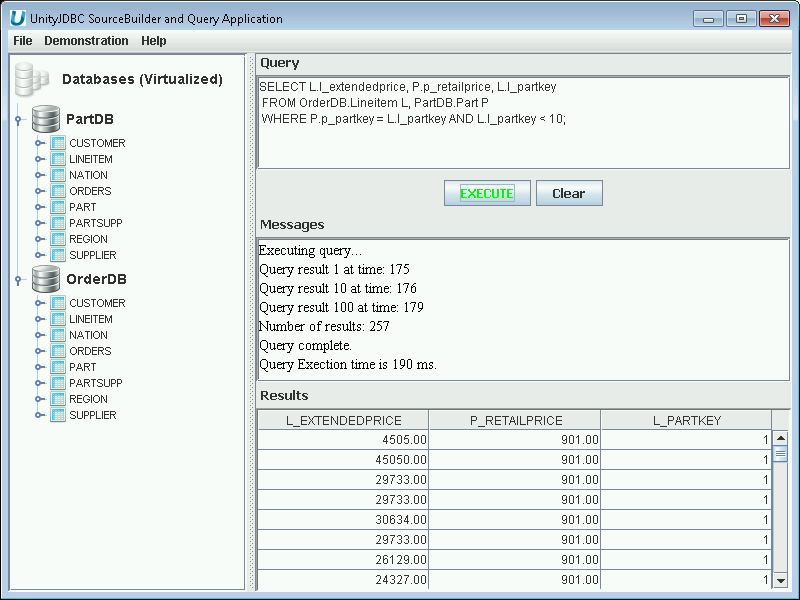
Multiple Database Query Example
-
Writing queries - UnityJDBC uses the standard SQL language. You can include as many databases in the virtual database that you wish. To reference a table in a given database, prefix it with the database name. In the example above, OrderDB.Lineitem refers to the Lineitem table in OrderDB (a user-assigned name for the sample HSQL database), and PartDB.Part refers to the Part table in the PartDB database. Writing queries is as easy as prefixing the table name with the database name!
-
Creating Your Own Virtual Database - A virtual database is defined using a sources XML file, often with the default filename of
sources.xml. Each database also has a schema file storing information on its tables and fields. These XML files are automatically built by SourceBuilder, but can also be edited directly at any time. A few quick steps to produce your own virtual database:-
Select
File->New Source Groupand use the defaultsources.xmlfile. -
Select
File->New Sourceand provide the JDBC connection information for your source. The screenshots below show MySQL and PostgreSQL.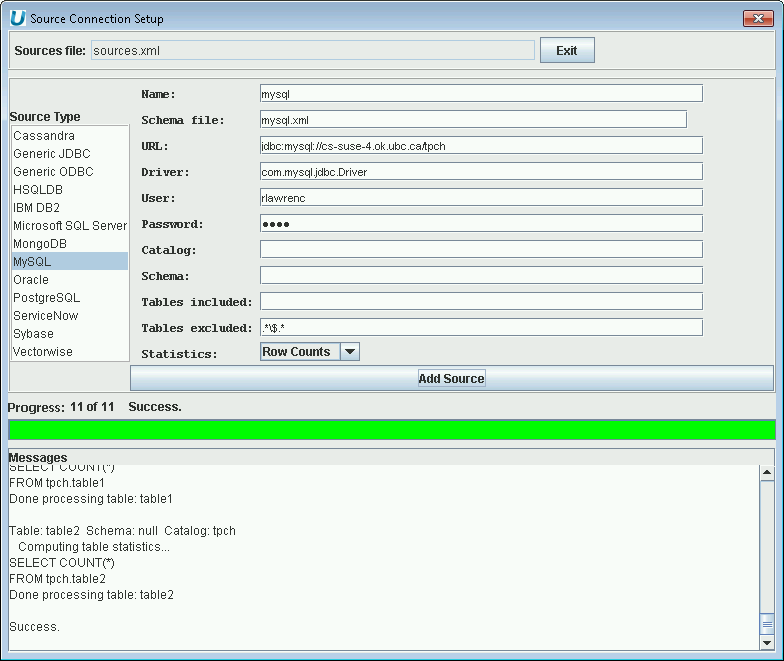
Multiple Database Virtualization - Adding MySQL Database
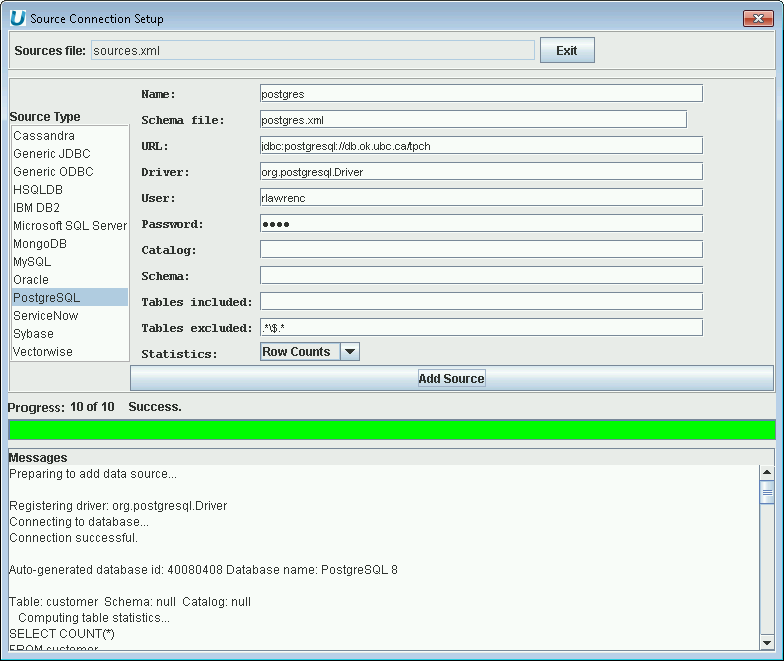
Multiple Database Virtualization - Adding PostgreSQL Database
-
Write a query that can join across multiple databases. The only difference from standard SQL is that you prefix the table name with the database name.
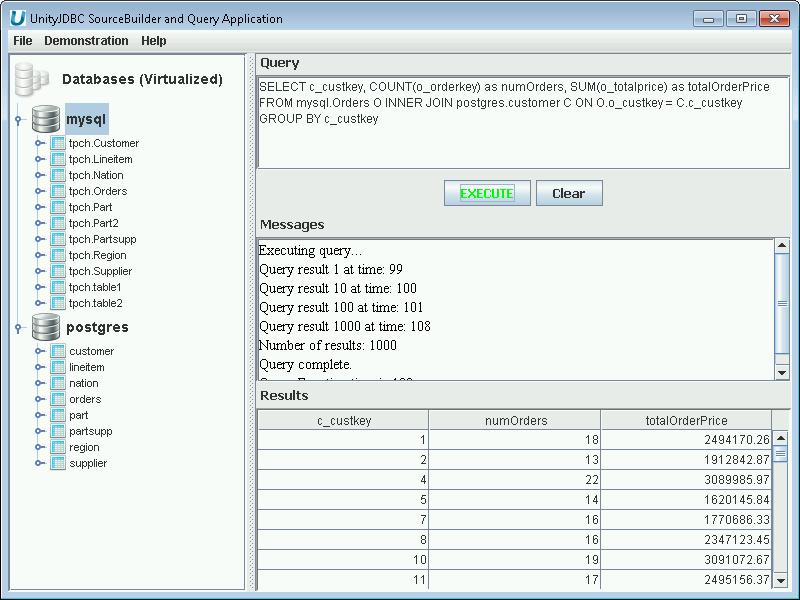
Multiple Database Query Example that Joins Table in MySQL with a Table in PostgreSQL
-
After creating your virtual database, you will have one
sources.xmland an XML schema file for each database. These files can be moved to any location and are used to configure UnityJDBC when using it with other applications.
-
-
Using UnityJDBC - Now that a virtual database is created, there are three general steps to using UnityJDBC common in all cases.
-
Move the
sources.xmland the XML schema files for the databases into a desired directory. For this example, the directory is/unityjdbc. -
Put the
unityjdbc.jarinto yourCLASSPATHas well as the drivers for each database. (Some drivers are included with the UnityJDBC distribution in the directorydriversin the installation folder.) A common location is in<JAVA_HOME>/jre/lib/ext. -
The connection information is the UnityJDBC driver class
unity.jdbc.UnityDriverand the URL isjdbc:unity://<relative or absolute path to sources file>such asjdbc:unity://unityjdbc/sources.xml.
The UnityJDBC driver can be used with any software that supports JDBC. A screenshot of configuring it in Aqua Data Studio is below. The same connection information applies to all JDBC-based software.
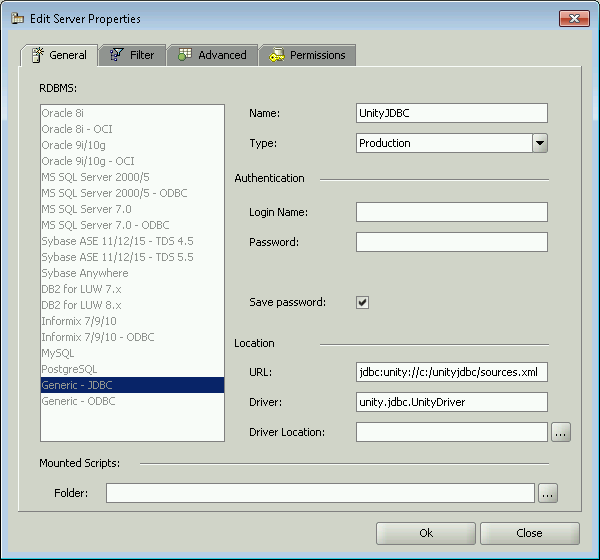
Registering the UnityJDBC Driver in Aqua Data Studio
UnityJDBC can also be used with your own Java programs. There is sample code in the
codedirectory in the installation folder. Here are two commands (executed from thecodedirectory) to compile and run the sample code:javac test/ExampleQuery.javajava test.ExampleQueryIf you have issues with compiling or running, try to explicitly indicate the location of the UnityJDBC JAR:
javac -cp .;../unityjdbc.jar;../sampleDB/hsqldb/hsqldb.jar
            test/ExampleQuery.java
java -cp .;../unityjdbc.jar;../sampleDB/hsqldb/hsqldb.jar test.ExampleQueryTo create your own Java program, copy the file
ExampleQuery.javatoMyQuery.java. There are 2 lines that you must modify. The first line indicates where your new sources XML file is located on your machine. You may specify an absolute or relative path from the current directory. The second line you must modify is to change the SQL query to reference fields and tables in your data source(s). Compile and run the program. Queries can reference any table or field in any data source in your XML sources file as long as you prefix a table or field with the database name such asMyDB.MyTable.MyField. -